Step by step Zetec installation - Page 3
Last

on November 04 2024
4. Change the flywheel/clutch

The 2.0 Mondeo flywheel has to be changed for the 1.8 Zetec Escort unit as the Mondeo flywheel is too deep and too large a diameter to fit inside the Fiesta type IB5 or BC gearbox housings. Burton Power and Raceline both sell lightened and balanced flywheels.
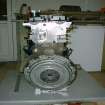
The clutch and drive plate used are AP Racing heavy duty 220mm race items, for the Fiesta.
5. Modify the chassis rail
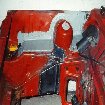
Basically, because the Zetec engine is slightly longer than the X-Flow, the chassis rail has to be modified to allow clearance for the crank pulley and cam timing belts etc especially for when the engine is trying to move around in the engine bay. The chassis rail is a box section, so you have to cut out quite a lot of metal, but I replaced it with 1.5mm steel. I've used Vibratechnics engine mountings to try to hold everything in place, and this does indeed prevent the engine moving too much. However all the vibration transmitted back through the shell causes the poly windows to rattle, which is alright when you have a crash helmet on, but would probably be a bit too uncomfortable for road use. Therefore the Vibratechnics engine mounts should probably only be used for competition use.
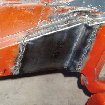
Not a difficult job, about 30 minutes with an angle grinder and cold chisel and it was ready for welding.
6. Modify the engine cradle
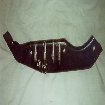
On the Escort/Fiesta 1.8 Zetec alloy sump, there are a series of strengthening 'fins' which sit right in the way of the engine cradle support bracket, preventing you from bolting the sump to the bracket. You could just cut the fins off the sump, but I decided to keep them for extra strength. Therefore the support bracket (shown) had to be slotted to allow it to fit with the fins retained. I used an angle grinder to slot the bracket, and had the bracket/engine cradle plastic coated to protect against corrosion.
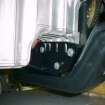
Here's a picture of the support bracket and cradle affixed to the engine/gearbox. The use of the 1.8 Zetec sump does however introduce another unique problem. The sump features a 20mm thick flange, which helps strengthen the sump. (go back to look at the picture of the 1.8 sump (above) and you'll see the flange at the top of the picture). However, because of the 20mm flange, the engine cradle is now offset away from the gearbox by 20mm, because the support bracket previously bolted directly on to the gearbox on the Fiesta Crossflow installation, whereas we're bolting the cradle to the gearbox, through the sump flange.
I decided to keep the flange, and relocate the engine cradle by 20mm to offset the offset! However, I've heard of a few people who simply decided to remove the flange altogether, therefore saving the effort of slotting the support bracket, and offsetting the cradle mounting points. Its up to you what you decide to do. If you're in a hurry, and you're not worried about losing some strength where the sump bolts to the gearbox then remove the flange. If you want maximum strength, retain the flange, slot the mounting bracket and relocate the cradle mounting points like I did [Step 7 below]. Its entirely up to you.
7. Relocate the engine cradle
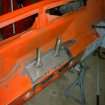
If you decide not to modify the sump, then you'll have to relocate both the front and the rear engine cradle mounting points in the chassis. You must use steel tubes inside the chassis rail to support the tremendous weight and compression from the mounting bolts. Otherwise the chassis box section will crush when you tighten the bolts.
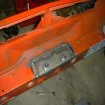
Simply move the mounting holes by 20mm, and fabricate some inserts like the ones shown, and weld in place.


